AI Content Creation Assistant — Part 4: User Interface


Welcome to part 4 of the AI content creation assistant series. In this series, we are building a full-stack generative AI application using TypeScript and Python. In the last part, we improved our GenAI workflows running in FastAPI by adding WebSockets and persistent storage. In this part, we will expand our solution by building a user interface using React. With this interface, users can browse their workflows and related artifacts.
Series
- AI Content Creation Assistant — Part 1: GenAI Workflows
- AI Content Creation Assistant — Part 2: FastAPI
- AI Content Creation Assistant – Part 3: WebSockets and Persistent Storage
- AI Content Creation Assistant – Part 4: User Interface
- AI Content Creation Assistant - Part 5: Deployment
What to expect
- Scaffolding a React application with Rspack
- How to use TanStack Router and Query
- Learn the WebSocket WebAPI
- Styling a website using Tailwind CSS
- Setting up CRUD endpoints using FastAPI
- How to perform joins using SqlAlchemy ORM
Prerequisites
- Read previous articles to understand GenAI workflows and FastAPI.
- Comfortable with programming, preferably experience with TypeScript and Python.
- Knowledge of the React library and component-driven design.
Getting started
We will scaffold our React application using Rspack, a high-performance JavaScript bundler written in Rust.
npm create rsbuild@latestAfter running this command, follow the prompts:
- Project name or path: content_assistant_demo
- Select framework: React 18
- Select language: TypeScript
- Select additional tools: Eslint and Prettier
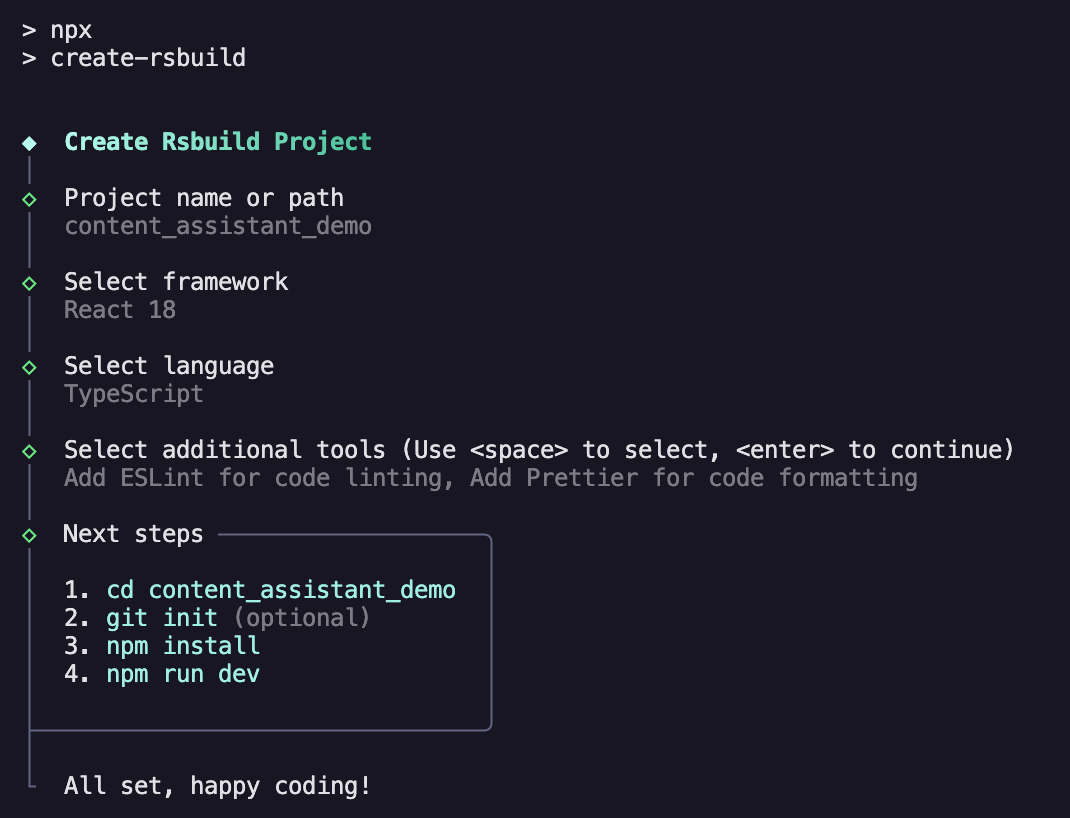
We now have a React application scaffold. Try out the app by running:
npm install #install dependencies
npm run dev #start the development server
Let's review what files were generated for us:
├── README.md
├── eslint.config.mjs
├── .prettierrc
├── package.json
├── rsbuild.config.ts
├── src
│   ├── App.css
│   ├── App.tsx
│   ├── env.d.ts
│   └── index.tsx
└── tsconfig.json- README.md - standard markdown file used to describe a codebase.
- eslint.config.mjs - eslint configuration file used to specify how our application should be linted (default settings are fine for now).
- prettierrc - settings for Prettier formatter.
- package.json - JSON file that contains information about the project, such as its name, version, dependencies, scripts, and other configuration details.
- rsbuild.config.ts - used to configure the Rspack bundler
- src - directory containing our source code.
- tsconfig.json - configuration file for the TypeScript compiler
We will primarily be working within the src directory. We only need to update the rsbuild.config.ts when we set up Tailwind and TanStack Router in a later section. With our project scaffolded, we are going to add four directories to our src folder:
- Components - contains components (HTML, CSS, javascript) shared across views.
- Config - includes a configuration file we will use to modify our application.
- Routes - Using Tanstank router file-based routing, this folder will contain all our routes.
- Services - holds logic related to data fetching.
TanStack
For this project, we will utilize two tools in the TanStack ecosystem: TanStack Query (formerly known as React Query) and TanStack Router. TanStack Query is a robust library for managing server state, simplifying asynchronous data handling, and improving application performance. Has a suite of capabilities built into it, such as caching, refetching, and native TypeScript support. TanStack Router is a complete type-safe router with built-in data fetching, stale-while revalidate caching, and first-class search param APIs.
First, we will delete app.tsx and app.css. Create an index.css file and leave it blank for now, we will add a tailwind import later. Paste the following code in index.tsx:
import './index.css';
import { StrictMode } from 'react';
import ReactDOM from 'react-dom/client';
import { RouterProvider, createRouter } from '@tanstack/react-router';
import { QueryClient, QueryClientProvider } from '@tanstack/react-query';
import { routeTree } from './routeTree.gen';

export const queryClient = new QueryClient();

const router = createRouter({
  routeTree,
  context: {
    queryClient,
  },
});
// Register the router instance for type safety
declare module '@tanstack/react-router' {
  interface Register {
    router: typeof router;
  }
}

const rootElement = document.getElementById('root')!;
if (!rootElement.innerHTML) {
  const root = ReactDOM.createRoot(rootElement);
  root.render(
    <StrictMode>
      <>
        <QueryClientProvider client={queryClient}>
          <RouterProvider router={router} />
        </QueryClientProvider>
      </>
      ,
    </StrictMode>,
  );
}
In index.tsx we import react-router and react-query from @tanstack. We initialize a new QueryClient to pass into our QueryClientProvider. The QueryClientProvider is a React Context Provider that allows us to pass the queryClient throughout the DOM tree to children components. We then create a router object that uses the routeTree auto generated from @tanstack/react-router. We also pass in the queryClient so its accessible in each route.
We register the router instance for type safety. Utilizing ReactDOM.createRoot() allows us to add a root div to index.html that is where the React code is render. Lastly we insert the QueryClientProvider and pass in the queryClient along with nesting the RouterProivder which is passed the router instance.
Rspack, Tailwind, & route generation
Next up is installing Tailwind, updating our index.css to import it and configuring our Rspack configuration to process Tailwind and generate route files.
Install necessary libraries:
npm install tailwindcss @tailwindcss/postcss postcss postcss-loaderUpdate index.css
@import "tailwindcss";Create postcss.config.mjs :
export default {
    plugins: {
      "@tailwindcss/postcss": {},
    },
  };
Configure rsbuild.config.ts
import { defineConfig } from '@rsbuild/core'
import { pluginReact } from '@rsbuild/plugin-react'
import { TanStackRouterRspack } from '@tanstack/router-plugin/rspack'

export default defineConfig({
  plugins: [pluginReact()],
  // @ts-ignore
  module: {
    rules: [
      {
        test: /\.css$/,
        use: ["postcss-loader"],
        type: "css",
      },
    ],
  },
  tools: {
    rspack: {
      plugins: [
        TanStackRouterRspack({ target: 'react', autoCodeSplitting: true }),
      ],
    },
  },

})
With the module rules added for postcss-loader and TanStackRouterRspack tool added to rsbuild. We can now use tailwind to style our components and any file we create under our routes folder will automatically update the routeTree.gen.ts file which our router uses.
You can find the accompanying docs related to these steps here:
At a high level, Tailwind CSS is a utility-first framework with a wide array of pre-defined CSS classes for styling elements directly in HTML. Eliminating the need (mostly) to create custom css style sheets. As you'll see in this project, we style our entire website without defining a single CSS class besides the index.css to import tailwind.
TanStack Query
Now, the foundation is set. We can style our application, create routes within the router directory, and have a queryClient available to fetch our server data. Let's dive into the services directory and fetch data. Note that the patterns described apply to each entity created in this series (Workflows, Blogs, Social Media), so I will show an example with one entity. See the source for the other implementations.
Workflows are the most unique as we use a POST method to fetch its data so we can send in more complex queries. Starting with workflows.ts:
import axios from "axios"
import { BlogType } from "./blog_posts";
import { SocialMediaType } from "./social_media_posts";
import config from "../config";

export type WorkflowStatus = "COMPLETE" | "FAILED" | "INPROGRESS"

type UUID = string;

export type WorkflowType = {
    id: number;
    guid: UUID;
    status: WorkflowStatus;
    created_at: Date;
    updated_at: Date;
}

export type Workflows = {
  total: number;
  workflows: [WorkflowType]
}

export type WorkflowAggregate = {
  workflow: WorkflowType;
  blog_posts:BlogType[];
  social_media_posts: SocialMediaType[]
}

export type FilterCriteria = {
  status: WorkflowStatus
}

export const fetchWorkflows = async (offset: number, limit: number, filter_criteria?: WorkflowStatus ) => {
    const payload = {
      offset,
      limit,
      filter_criteria: filter_criteria
    };
    return axios
      .post<Workflows>(`${config.CONTENT_SERVER_URL}/workflows`, payload)
      .then((r) => r.data)

  }

  export const fetchWorkflow = async (workflow_guid: string) => {
      const response = await axios
        .get<WorkflowAggregate>(`${config.CONTENT_SERVER_URL}/workflow`, {
          params: {
            workflow_guid
          }
        })
        console.log(response.data)
        return response.data
}- We define the Workflow types
- Create two functions
- fetchWorkflows (POST): fetch all workflows to display in a dashboard (path:
/workflows). - fetchWorkflow (GET): fetch a single workflow.
- fetchWorkflows (POST): fetch all workflows to display in a dashboard (path:
Next, we define our workflowsQueryOptions.ts:
import { queryOptions } from "@tanstack/react-query";
import { fetchWorkflow, fetchWorkflows, FilterCriteria } from "./workflows";

export const workflowsQueryOptions = (offset: number, limit: number, filter_criteria?: FilterCriteria) => queryOptions({
    queryKey: ['workflows', offset, limit, filter_criteria],
    // @ts-ignore
    queryFn: () => fetchWorkflows(offset, limit, filter_criteria)
})

export const workflowQueryOptions = (workflow_guid: string) => queryOptions({
    queryKey: ['workflow', {workflow_guid}],
    queryFn: () => fetchWorkflow(workflow_guid)
})
QueryOptions allow you to customize the behavior of your queries to suit your specific needs. Each option includes a queryKey to uniquely identify the query and a queryFn that defines how to fetch the data. You can then use these options in your route loader or components.
TanStack Router
With data fetching defined for workflows, lets create our three workflows paths to fetch all workflows, fetch a single workflow, and create a workflow.
Within the routes directory, create a workflows directory and create three files:
index.tsxcreate.tsx$workflowId.tsx
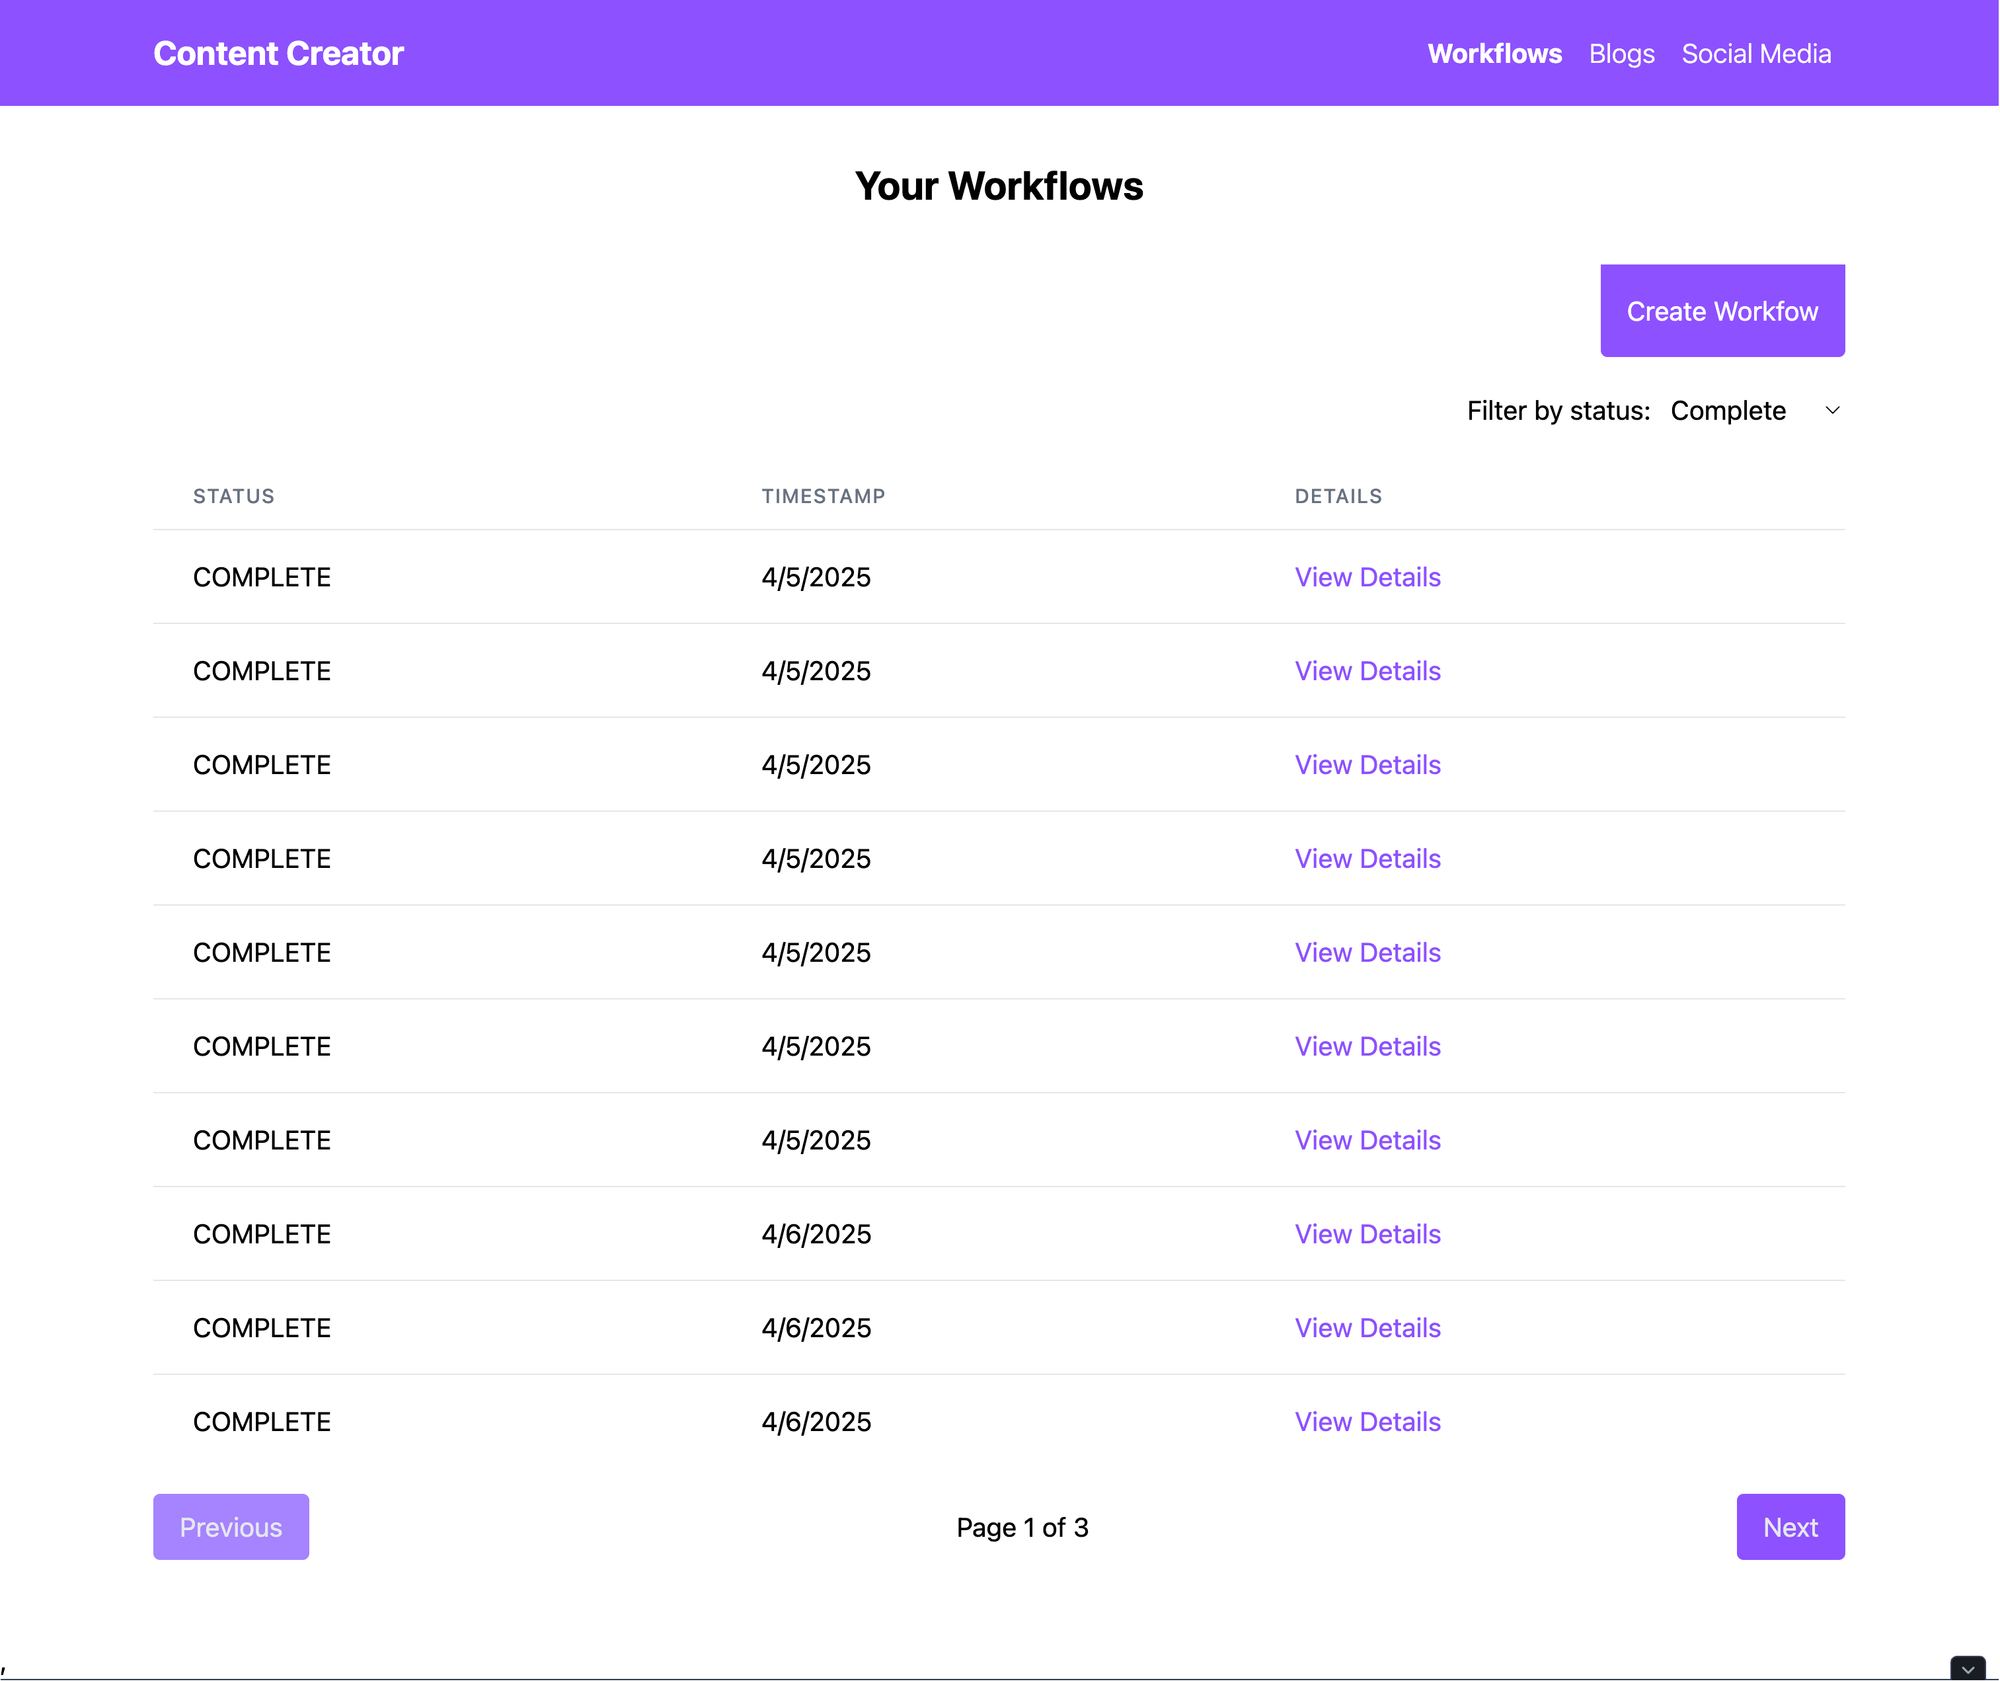
index.tsx files within a directory match the name of the directory for its path, so in this case /workflows. We build a dashboard to view all of our workflows.
/Workflows
import { createFileRoute, Link } from '@tanstack/react-router';
import { workflowsQueryOptions } from '../../services/workflowsQueryOptions';
import { useSuspenseQuery } from '@tanstack/react-query';
import { useState } from 'react';
import Pagination from '../../components/pagination/pagination';

export const Route = createFileRoute('/workflows/')({
  component: RouteComponent,
  loader: ({
    // @ts-ignore
    context: { queryClient },
    // @ts-ignore
    params: { offset, limit, filter_criteria },
  }) =>
    queryClient.ensureQueryData(
      workflowsQueryOptions(offset, limit, filter_criteria),
    ),
});

function RouteComponent() {
  const [offset, setOffset] = useState(0);
  const [filterCriteria, setFilterCriteria] = useState({ status: 'COMPLETE' });
  const LIMIT = 10;
  const workflowsQuery = useSuspenseQuery(
    // @ts-ignore
    workflowsQueryOptions(offset, LIMIT, filterCriteria),
  );
  const workflows = workflowsQuery.data.workflows;
  const total = workflowsQuery.data.total;

  const handleFilterChange = (newFilter: string) => {
    setFilterCriteria({ status: newFilter }); // Update the filter
    setOffset(0); // Reset offset or adjust as needed
  };

  return (
    <div className="container mx-auto my-8 flex flex-col">
      <div className="mb-8 text-center text-2xl font-bold">Your Workflows</div>
      <div className="w-full flex lg:justify-end mb-4">
        <Link to="/workflows/create">
          <button className="p-4 bg-violet-500 hover:bg-violet-700 text-white rounded-b-sm cursor-pointer">
            Create Workfow
          </button>
        </Link>
      </div>
      <div className="flex lg:justify-end mb-4">
        {/* <h2 className="text-xl font-bold">Table settings</h2> */}
        <div className="flex justify-between">
          <label htmlFor="statusFilter" className="mr- py-1">
            Filter by status:
          </label>
          <select
            id="statusFilter"
            value={filterCriteria.status}
            onChange={(e) => handleFilterChange(e.target.value)}
            className=" rounded py-1 px-2 outline-violet-500"
          >
            <option value="COMPLETE">Complete</option>
            <option value="FAILED">Failed</option>
            <option value="INPROGRESS">In Progress</option>
          </select>
        </div>
      </div>
      <div className="overflow-x-auto">
        <table className="min-w-full bg-white divide-y divide-gray-200">
          <thead>
            <tr>
              <th className="px-6 py-3 text-left text-xs font-medium text-gray-500 uppercase tracking-wider">
                Status
              </th>
              <th className="px-6 py-3 text-left text-xs font-medium text-gray-500 uppercase tracking-wider">
                Timestamp
              </th>
              <th className="px-6 py-3 text-left text-xs font-medium text-gray-500 uppercase tracking-wider">
                Details
              </th>
            </tr>
          </thead>
          <tbody className="bg-white divide-y divide-gray-200">
            {workflows.map((item, index) => (
              <tr key={index}>
                <td className="px-6 py-4">{item.status}</td>
                <td className="px-6 py-4">
                  {new Date(item.created_at).toLocaleDateString()}
                </td>
                <td className="px-6 py-4">
                  <Link
                    to="/workflows/$workflowId"
                    params={{ workflowId: item.guid }}
                    className="text-violet-500 hover:underline"
                  >
                    View Details
                  </Link>
                </td>
              </tr>
            ))}
          </tbody>
        </table>
      </div>
      <Pagination
        total={total}
        offset={offset}
        limit={LIMIT}
        setOffset={setOffset}
      />
    </div>
  );
}
TanStack router will auto-generate the Route variable and fill in the path to match the directory/filename. The loader ensures that the data required inside of a route has been loaded and is ready to be displayed (note we did not define error handling, part of the challenges below). Within the loader, we can access the global context. In index.tsx we passed in the queryClient and are utilizing it to fetch our Workflow data. We also define the parameters we workflowsQueryOptions expect.
ensureQueryData is an asynchronous function that can get an existing query's cached data. If the query does not exist, queryClient.fetchQuery will be called, and its results will be returned. We pass to ensureQueryData workflowsQueryOptions with required parameters. Within our component, we define a variable to manage our offset for pagination, filter criteria, and a constant LIMIT (there is a challenge to make this changeable by the user below). Using useSuspenseQuery hook, we fetch our workflows from the server. The server has been modified to return the workflows and a total count of workflows for pagination.
You then can use Tailwind to create a table to display our workflow status, the time it was created, and a link to view each workflow detail. We also added table filtering and a path to create a workflow.
/workflows/$workflowsId
import { createFileRoute } from '@tanstack/react-router';
import { workflowQueryOptions } from '../../services/workflowsQueryOptions';
import { useSuspenseQuery } from '@tanstack/react-query';
import BlogCard from '../../components/blog/blog';
import SocialMediaCard from '../../components/social_media/social_media';

export const Route = createFileRoute('/workflows/$workflowId')({
  component: RouteComponent,
  // @ts-ignore
  loader: ({ context: { queryClient }, params: { workflowId } }) => {
    return queryClient.ensureQueryData(workflowQueryOptions(workflowId));
  },
});

function RouteComponent() {
  const workflowId = Route.useParams().workflowId;
  const { data: data } = useSuspenseQuery(workflowQueryOptions(workflowId));

  return (
    <div className="container mx-auto">
      <div className="my-8 text-center text-2xl font-bold">
        Workflow: {data.workflow.guid.slice(0, 8)} - {data.workflow.status}
      </div>
      <div>
        <h2 className="text-2xl font-bold">Blog Posts</h2>
        {[...data.blog_posts].map((blog, index) => {
          return <BlogCard key={index} blog={blog}></BlogCard>;
        })}
      </div>
      <br />
      <div>
        <h2 className="text-2xl font-bold">Social Media Posts</h2>
        {[...data.social_media_posts].map((sm_post, index) => {
          return <SocialMediaCard key={index} social_media={sm_post} />;
        })}
      </div>
    </div>
  );
}
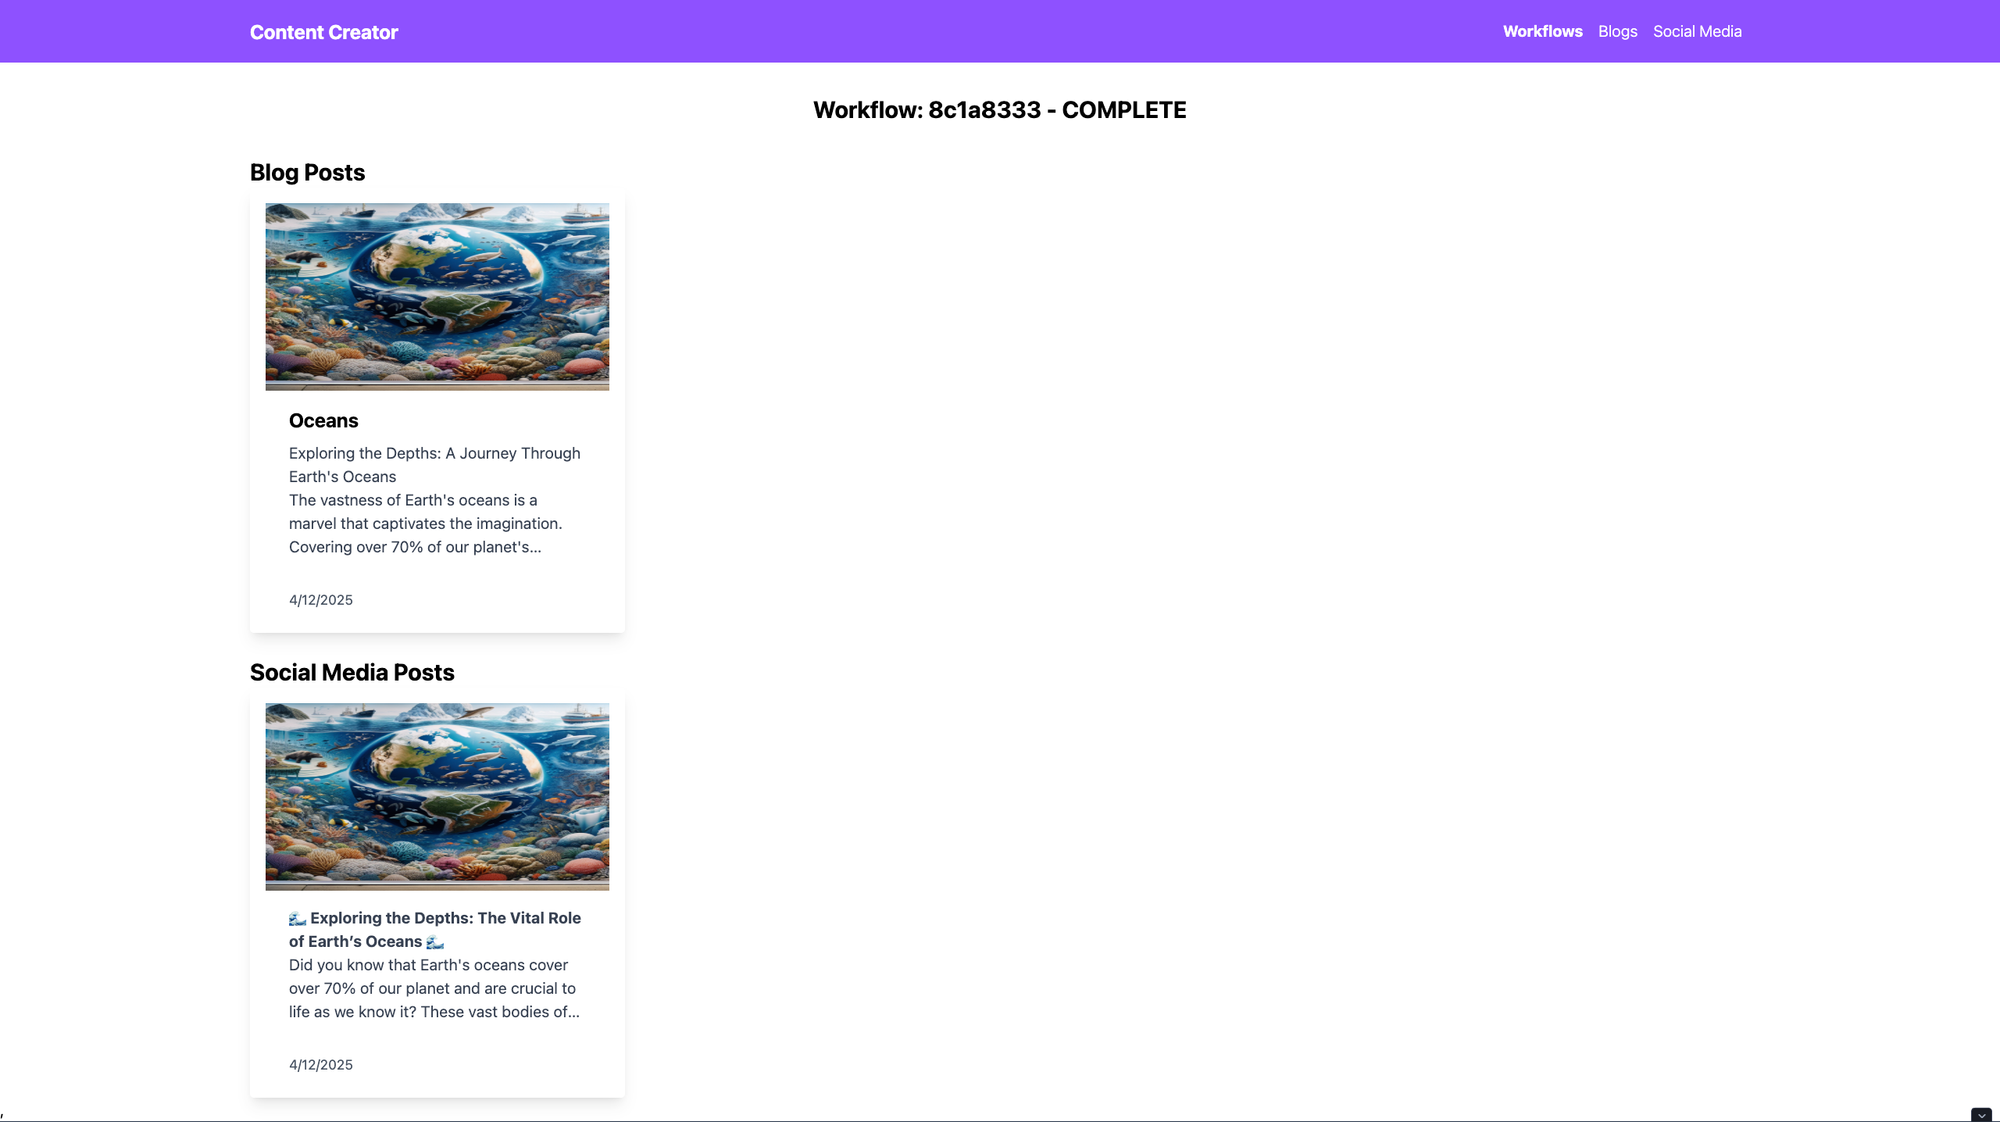
Similarly in $workflowId.tsx, we have a Route component with a defined loader that accesses queryClient and params to pass into the queryClient. We access the workflowId param from the Route.useParams() hook. The server has been modified to return a single workflow and all related entities. In this case, a list of blog and social media posts that we can then loop over and display using custom components built with a tailwind.
The approach we took to view all Workflows and an individual Workflow instance is the same for Blogs and Social Media entities, see source code to replicate or build from scratch.
/workflows/create
Content Creation workflow
import { useEffect, useRef, useState } from 'react';
import { createFileRoute, useNavigate } from '@tanstack/react-router';
import config from '../../config';
interface UserMessage {
topic: string;
research: boolean;
}
interface ServerMessage {
type: string;
payload: string;
}
type Message = UserMessage | ServerMessage;
export const Route = createFileRoute('/workflows/create')({
component: RouteComponent,
});
function RouteComponent() {
const [messages, setMessages] = useState<Message[]>([]);
const [inputTopic, setInputTopic] = useState<string>('');
const [inputResearch, setInputResearch] = useState<boolean>(false);
const [inputVisible, setIsVisible] = useState<boolean>(true);
const ws = useRef<WebSocket | null>(null);
const navigate = useNavigate();
useEffect(() => {
ws.current = new WebSocket(`${config.CONTENT_SERVER_WS}/content`);
ws.current.onopen = () => {
console.log('Connected to WebSocket server');
};
ws.current.onmessage = (event) => {
try {
const serverMessage: ServerMessage = JSON.parse(event.data);
setMessages((prevMessages) => [...prevMessages, serverMessage]);
if (serverMessage.type === 'results') {
if (serverMessage.payload !== 'Failed') {
const workflowGuid = serverMessage.payload;
setTimeout(() => {
navigate({ to: `/workflows/${workflowGuid}` });
}, 5000);
} else {
alert('The workflow has failed. We are looking into issue.');
}
} else if (serverMessage.type === 'error') {
}
} catch (error) {
console.error('Error parsing message:', error);
}
};
ws.current.onerror = (error) => {
console.error('WebSocket error:', error);
};
ws.current.onclose = () => {
console.log('Disconnected from WebSocket server');
};
return () => {
if (ws.current) {
ws.current.close();
}
};
}, [navigate]);
const sendMessage = () => {
if (ws.current && ws.current.readyState === WebSocket.OPEN) {
const userMessage: UserMessage = {
topic: inputTopic,
research: inputResearch,
};
ws.current.send(JSON.stringify(userMessage));
setMessages([...messages, userMessage]);
setInputTopic('');
setIsVisible(false);
}
};
return (
<div className="flex h-screen w-screen justify-center items-center px-4 py-6 flex-col">
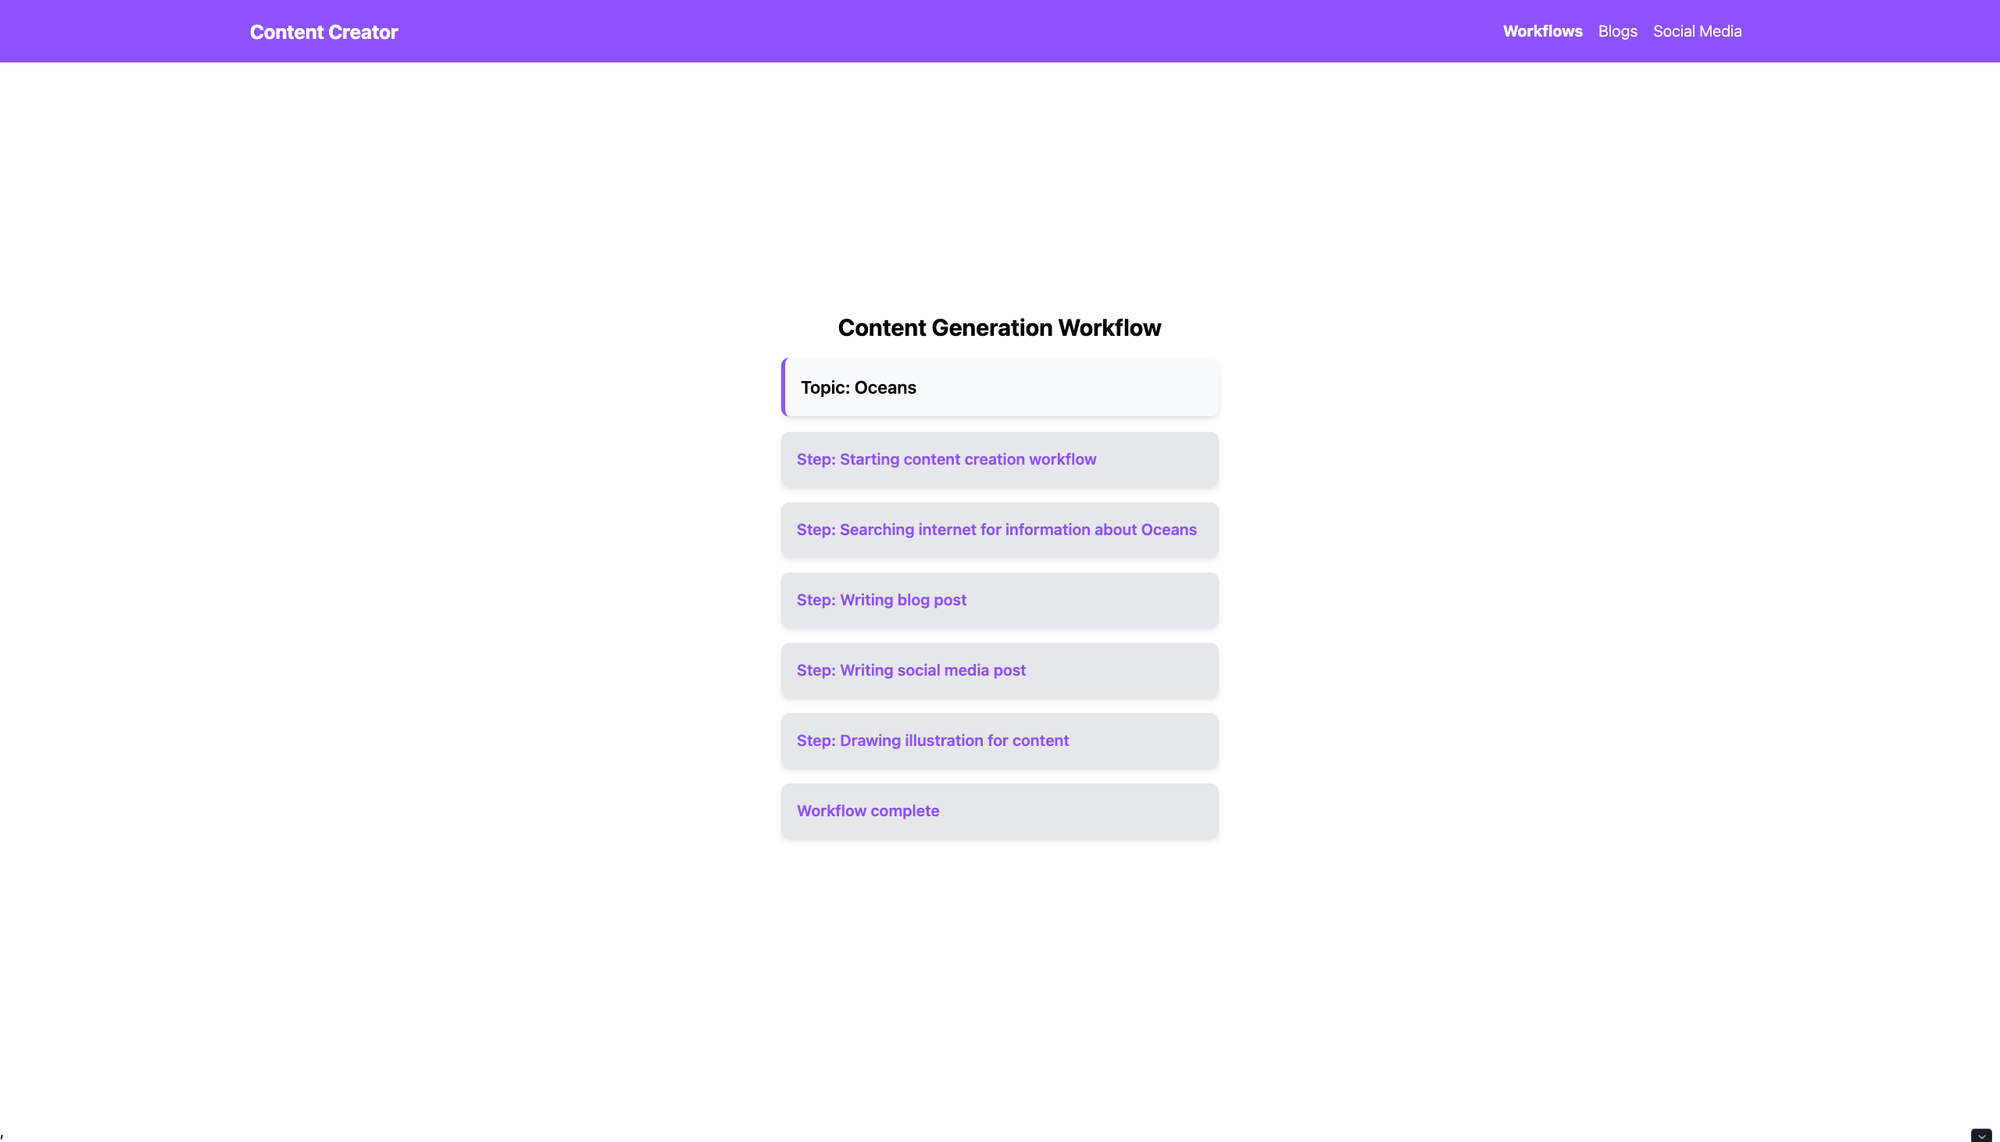
<h2 className="text-2xl font-bold mb-4">Content Generation Workflow</h2>
<div className="mb-4 w-full max-w-md mx-auto">
<ul className="list-none p-0">
{messages.map((msg, index) => {
if ('topic' in msg) {
return (
<li
key={index}
className="mb-4 p-4 rounded-lg shadow-md bg-gray-50 border-l-4 border-violet-500"
>
<p className="text-lg font-semibold">Topic: {msg.topic}</p>
</li>
);
} else {
return (
<li
key={index}
className="mb-4 p-4 rounded-lg shadow-md bg-gray-200"
>
{msg.type === 'progress_event' ? (
<p className="font-semibold text-violet-500">
Step: {msg.payload}
</p>
) : msg.type === 'error' ? (
<p className="font-semibold text-violet-500">
{msg.type}: {msg.payload}
</p>
) : (
<p className="font-semibold text-violet-500">
Workflow complete
</p>
)}
</li>
);
}
})}
</ul>
</div>
{inputVisible && (
<div className="flex flex-col w-full max-w-md mx-auto">
<input
type="text"
value={inputTopic}
onChange={(e) => setInputTopic(e.target.value)}
className="border border-gray-300 p-3 rounded shadow-sm mb-4 focus:border-violet-500 focus:ring focus:ring-violet-200 focus:outline-none"
placeholder="Type a research topic"
/>
<div className="mb-4 flex flex-col">
<div className="flex items-center mb-1">
<input
type="checkbox"
checked={inputResearch}
onChange={(e) => setInputResearch(e.target.checked)}
className="form-checkbox h-5 w-5 text-violet-600"
/>
<label className="ml-2 text-gray-700">Research</label>
</div>
<span className="text-xs text-gray-500 ml-7">
This will source information from the internet to enhance the
generation quality.
</span>
</div>
<button
onClick={sendMessage}
className="bg-violet-500 hover:bg-violet-700 text-white font-bold py-2 px-4 rounded shadow transition duration-300 ease-in-out transform hover:scale-105"
>
Send
</button>
</div>
)}
</div>
);
}
The create view has some uniqueness to it. We can wrap the whole app and connect when approaching WebSocket scenarios when the React app mounts. However, in this case, this is the only view that requires the WebSocket connection. When a user routes to this path, using React lifecycle methods (useEffect), we handle:
- Setting up the WebSocket connection
- How to respond to different types of messages:
- If the workflow fails, we will display the message and alert the user
- If successful, we use the
useNavigate()hook to navigate the user to the new workflow instance - Handle errors briefly (can expand error handling)
- Every other message gets appended to the
messagesstate and is viewable on the UI as the workflow progresses.
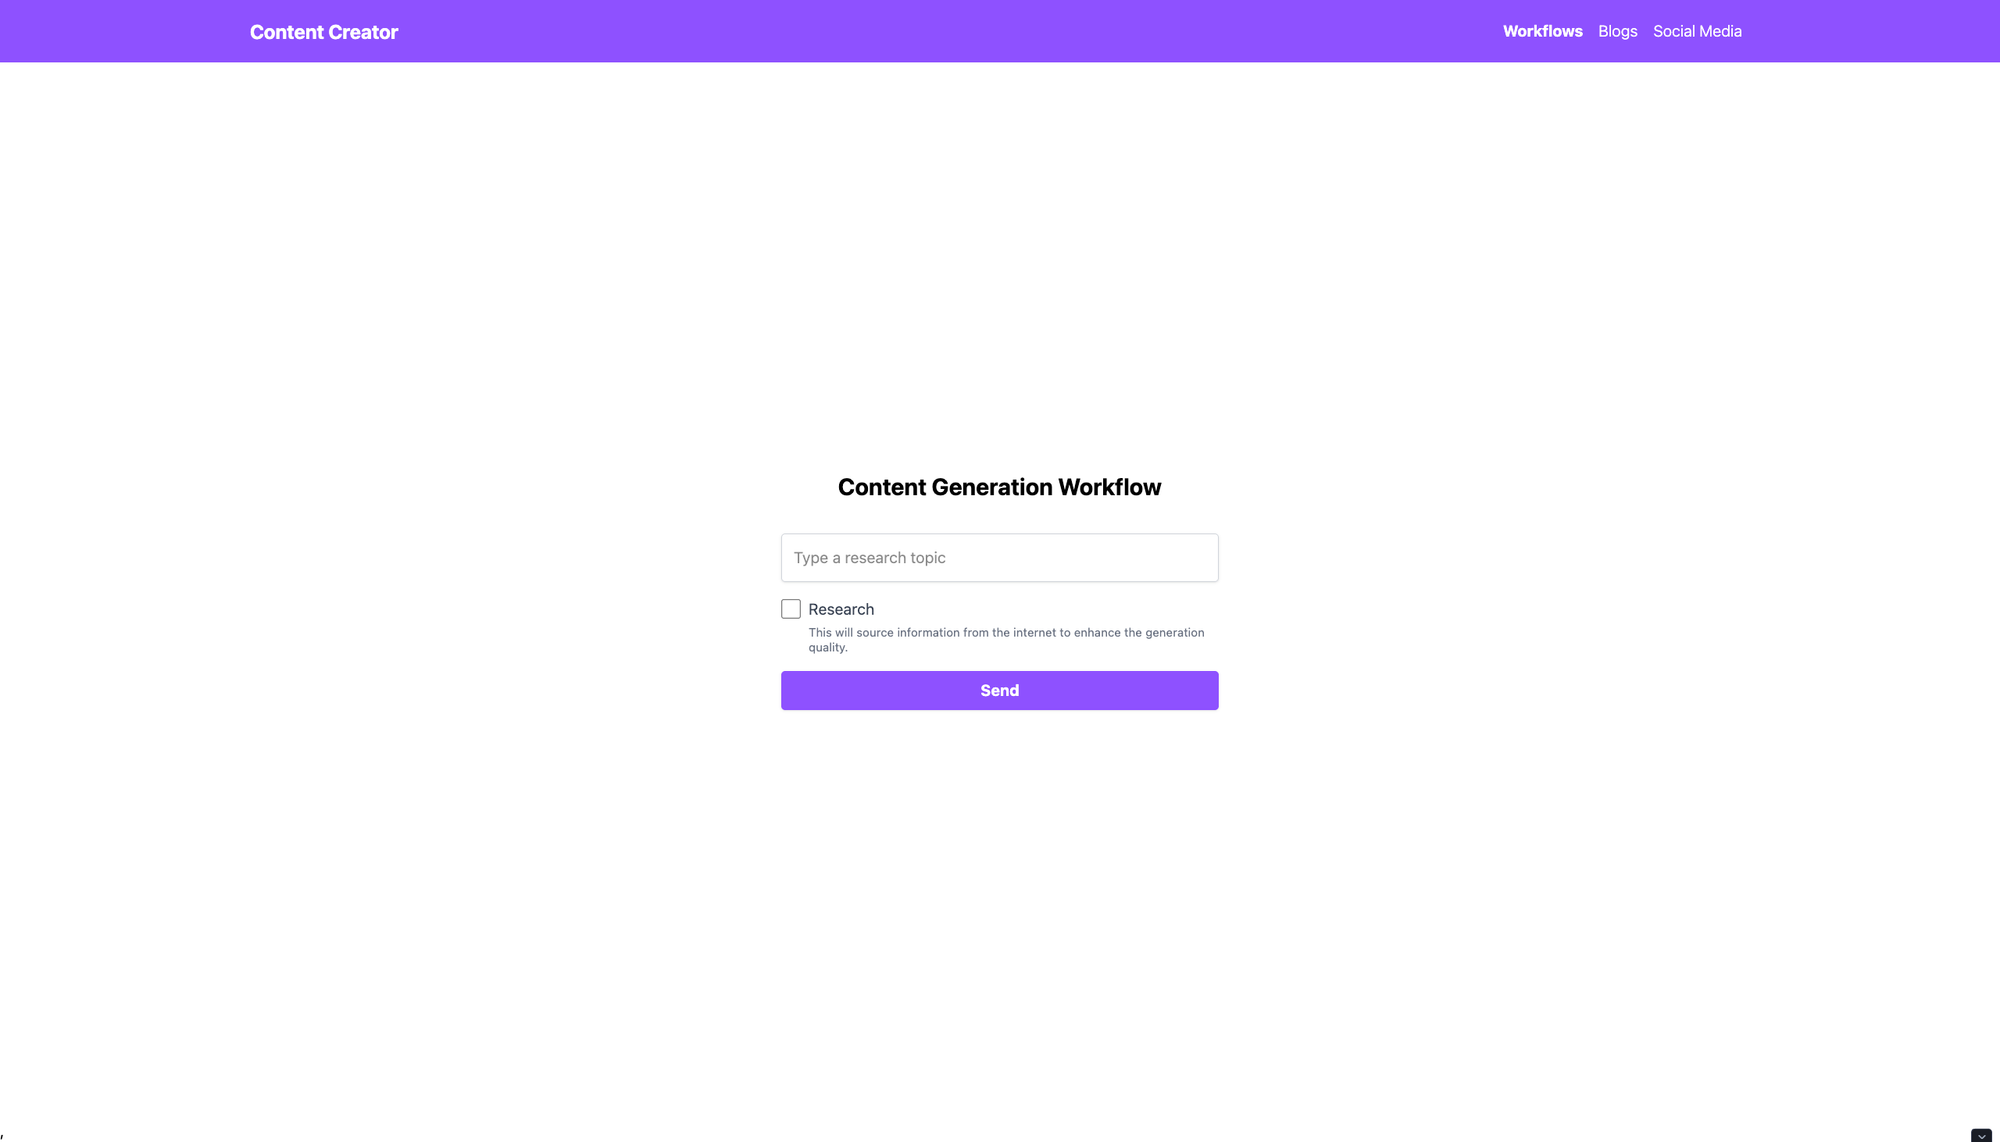
- Users can send a topic to generate content and optionally click the research checkbox to send a true/false value for the research field.
As observed in the screenshot, after a user submits their topic, the workflow updates them with its step as it progresses through the content generation. We have covered the main components of our UI and the general patterns for accessing the data generated. Let's now transition into the FastAPI changes that make this possible.
CRUD Endpoints
In part 3, our FastAPI server had a single WebSocket endpoint /content. To accommodate the retrieval of Workflows, Blogs, and Social Media Post we add a few more endpoints:
# rest of content/api.py

def get_workflow_service(db: Session = Depends(get_db)):
    repository = WorkflowRepository(db)
    return WorkflowService(repository)

def get_blog_service(db: Session = Depends(get_db)):
    repository = BlogRepository(db)
    return BlogService(repository)

def get_social_media_Service(db: Session = Depends(get_db)):
    repository = SocialMediaRepository(db)
    return SocialMediaService(repository)

@router.get("/social_media_posts")
async def fetchSocialMediaPosts(offset: int = 0, limit: int = 10, service: SocialMediaService = Depends(get_social_media_Service)):
    try:
        return await service.get_all_social_media_posts(offset=offset, limit=limit)
    except Exception as e:
        raise Exception(f"{e}")

@router.get("/social_media_post")
async def fetchSocialMediaPost(sm_guid, service: SocialMediaService = Depends(get_social_media_Service)):
    try:
        return await service.get_social_media_post(social_media_guid=sm_guid)
    except Exception as e:
        raise Exception(f"{e}")

@router.post("/workflows")
async def fetchWorkflows(query: WorkflowQuery, service: WorkflowService = Depends(get_workflow_service)):
    try:
        return await service.get_workflows(query.offset, query.limit, query.filter_criteria, query.sort_field, query.sort_order)
    except Exception as e:
        logger.error(e)
        raise HTTPException(status_code=500, detail=str(e))

@router.get("/workflow")
async def fetchWorkflow(workflow_guid: str, service: WorkflowService = Depends(get_workflow_service)):
    try:
        return await service.get_workflow_details(workflow_guid)
    except Exception as e:
        raise Exception(f"{e}")

@router.get("/blogs")
async def fetchBlogs(offset: int = 0, limit: int = 10, service: BlogService = Depends(get_blog_service)):
    try:
        return await service.get_blogs(offset, limit)
    except Exception as e:
        raise Exception(f"{e}")

@router.get("/blog")
async def fetchBlog(blog_guid: str, service: BlogService = Depends(get_blog_service)):
    try:
        return await service.get_blog_details(blog_guid)
    except Exception as e:
        raise Exception(f"{e}")

# rest of content/api.py
We define six new endpoints. Each is responsible for fetching one to many entities. Five of our endpoints are GET methods, and the /workflows endpoint is a POST request, so we can pass in more complex options to filter by. As before, the patterns to enable this logic are similar per entity, so I'll show one example. See the source code for other implementations.
In part 3, we introduce the services and repository patterns. We will update these files to enable the one-to-many fetching of entities. Since Workflows is unique, we'll review its implementation.
In our workflow_service.py we define four methods to create, update, fetch a single, and fetch all workflows:
class WorkflowService:
    def __init__(self, repository: WorkflowRepository):
        self.repository = repository

    async def create_workflow(self, workflow_data: WorkflowCreate) -> Workflow:
        workflow = await self.repository.create_workflow(workflow_data)
        return Workflow.model_validate(workflow)

    async def update_workflow(self, workflow_id: int, workflow_data: WorkflowUpdate) -> Workflow:
        workflow = await self.repository.update_workflow(workflow_id, workflow_data)
        return Workflow.model_validate(workflow)

    async def get_workflow_details(self, workflow_guid: str) -> Workflow:
        return await self.repository.get_workflow_details(workflow_guid)

    async def get_workflows(self, offset: int, limit: int, filter_criteria: Optional[dict], sort_field: Optional[str], sort_order: Optional[str]) -> list[Workflow]:
        return await self.repository.get_workflows(offset, limit, filter_criteria, sort_field, sort_order)
We added pagination logic to get_workflows and other bulk endpoints. For each bulk endpoint, we pass in an offset and limit. Each bulk endpoint will use these parameters to return a subset of the data, along with the total count of entities so the client application can show page count to users. For this example, I provided a way to filter workflows, specifically by status (inprogress, failed, complete).
Reviewing workflow_repository.py , we define two new methods to get workflow details and fetch all workflows (don't forget to update its interface!):
# rest of workflow_repository code

  async def get_workflow_details(self, workflow_guid: str) -> dict:
        try:
            query = (
                select(DatabaseWorkflow)
                .options(
                    joinedload(DatabaseWorkflow.blog_posts).joinedload(BlogPosts.image),
                    joinedload(DatabaseWorkflow.social_media_posts).joinedload(SocialMediaPosts.image)
                )
                .where(DatabaseWorkflow.guid == workflow_guid)
            )
            result = await self.db.execute(query)
            workflow = result.scalars().first()

            if not workflow:
                raise Exception("Workflow not found")

            blog_posts_data = [
                {
                    "id": post.id,
                    "guid": post.guid,
                    "title": post.title,
                    "content": post.content,
                    "created_at": post.created_at,
                    "image_url": post.image.url if post.image else None
                }
                for post in workflow.blog_posts
            ]

            social_media_posts_data = [
                {
                    "id": post.id,
                    "guid": post.guid,
                    "content": post.content,
                    "platform_type": post.platform_type.value,
                    "created_at": post.created_at,
                    "image_url": post.image.url if post.image else None
                }
                for post in workflow.social_media_posts
            ]

            return {
                "workflow": {
                    "id": workflow.id,
                    "guid": workflow.guid,
                    "status": workflow.status.value,
                    "created_at": workflow.created_at,
                },
                "blog_posts": blog_posts_data,
                "social_media_posts": social_media_posts_data,
            }
        except Exception as e:
            raise Exception(f"Unable to fetch workflow details: {e}")


    async def get_workflows(self, offset, limit, filter_criteria: Optional[dict] = None, sort_field: Optional[str] = None, sort_order: Optional[str] = 'desc') -> WorkflowList:
        try:
        # Start building the query
            base_query = select(DatabaseWorkflow)

            # Apply filtering criteria
            if filter_criteria:
                for key, value in filter_criteria.items():
                    base_query = base_query.where(getattr(DatabaseWorkflow, key) == value)

            # Apply sorting
            if sort_field:
                sort_column = getattr(DatabaseWorkflow, sort_field)
                if sort_order == "desc":
                    base_query = base_query.order_by(desc(sort_column))
                else:
                    base_query = base_query.order_by(asc(sort_column))

            # Count total results with filtering applied
            total_result = await self.db.execute(select(func.count()).select_from(base_query.subquery()))
            total = total_result.scalar_one()

            # Execute the query with offset and limit for pagination
            result = await self.db.scalars(base_query.offset(offset).limit(limit))
            workflows = result.all()
            return {
                "total": total,
                "workflows": [Workflow.model_validate(wf) for wf in workflows]
            }
        except Exception as e:
            raise Exception(f"Unable to fetch workflows: {e}")
As shown in the workflow details screenshot in the TanStack Router section, you can view all related blogs and social media posts when viewing the details of a workflow. We accomplish this in the code by using the SqlAlchemy ORM joinedload function. The joinedload function augments the SELECT statement being passed to the database with a JOIN. Using this, we:
- Select our Workflow Model
- Pass in options
- join our blog posts with its related image
- join our social media post with its related image
- Where the database workflow model GUID matches the GUID passed into the
get_workflow_detailsmethod.
Then, we format the data to be returned to the client in a dictionary containing the workflow details and a list of blog and social media posts. Our workflow currently only creates one of each per run, but it can easily be extended to create multiple per run.
When it comes to returning all workflows, we perform a series of steps:
- Declare a base query to query all records
- If there is a filter criteria, we append a where clause to add conditions from
filter_crtieria - If there is a sort field, we append an order by clause to append sorting based on
sort_fieldandsort_order - Execute the query with any conditions added to get the total count
- Execute the query with
offsetandlimitapplied to grab a subset of records - Create a dictionary containing the total and list of workflows to return.
With this in place, we can fetch a single workflow with all related entities. As well as fetch all workflows using filtering and sorting.
Summary
This post discussed the creation of a user interface for our content creation application. We began by scaffolding a React application using Rspack. We then modified the Rspack configuration to integrate Tailwind CSS and the TanStack Router. Additionally, we explored file-based routing with the TanStack Router and demonstrated how to fetch data using TanStack Query. Finally, we updated our FastAPI endpoints, services, and repositories to support pagination, return entities, and implement advanced filtering conditions.
Challenges
- Update the Workflow dashboard and related query files to allow sorting.
- Review TanStack Router documentation and add Error components to each route.
- We did not implement editing of blogs or social media posts. Add
/editroute for each entity, style the view, add a markdown editor, and save the edits to the database.
What's Next
Thank you for tuning into part 4 of the AI Content Creator series. For part 5, we will package our applications using Docker and deploy them to a Kubernetes cluster. We will also utilize Hashicorp Vault and External Secrets Operator (ESO) to pass secrets to our Kubernetes pods safely.
Stay tuned!
Check out my GitHub for the complete implementation. I look forward to any feedback and discussions. I am currently a Software Architect at Groups360. Feel free to connect with me on LinkedIn.